Testing pykube for OpenID Connect support
Posted on Mon 11 May 2020 in work
Why
During review of my PR#49 to the pykube library to add OpenIDConnect token refresh capabilities I was asked to provide some instructions on how to setup a Kubernetes cluster with OpenIDConnect for development/testing/verification of that PR.
At work, we have a central common Keycloak instance running, which I was testing my patch against. I myself never set up something like this, so this seemed like a good opportunity to get creative and learn something new in the process :-)
UPDATE
The PR in question was merged and is available in pykybe-ng >= 20.10.0.
Also note the new home for pykube-ng at Codeberg.org.
Choosing an OpenID provider
Most available sources and tools I could find are using either Google or Azure as OpenID providers together with Kubernetes.
I don't have Azure account, and when I tried Google it seems that all previous instructions were a bit outdated. Google seems to have tightened its security around OpenID (which is understandable as "Login with Google" is quite popular and may be abused). It now requires proper registered domain for callbacks with properly signed TLS cert (not a self-signed one). Both of those are overly restrictive / impossible for a local dev env.
While searching for alternatives and more info on OpenID in general I stumbled on very nice set of articles by Okta (first part), that helped me a lot with understanding the concept and flow. So I decided to give Okta a try and set up my dev env there.
Setting up Okta as IdP
Create free account on https://developer.okta.com Free tier is IMO quite enough for personal development (currently it caps at 1k monthly active users and 5 apps/clients).
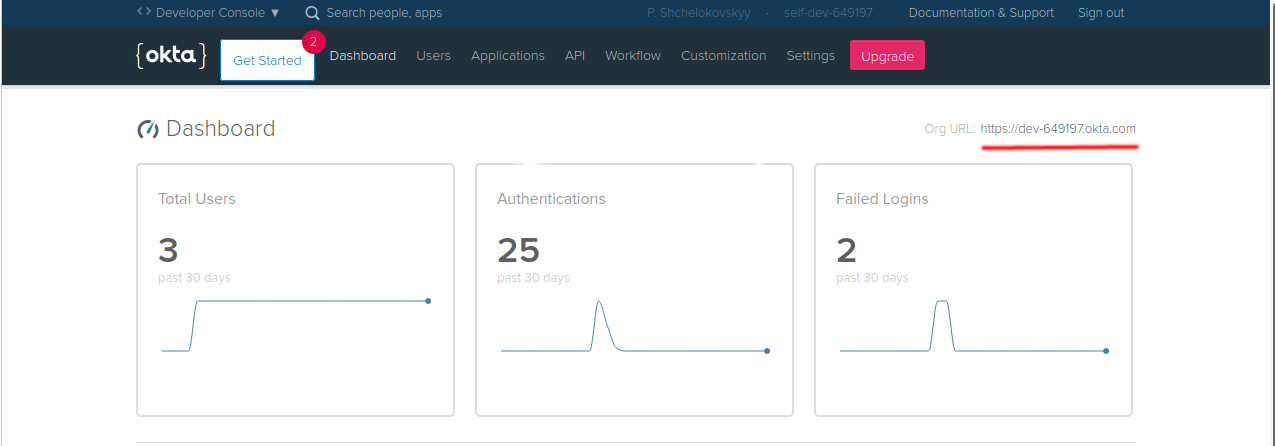
On the Okta site Dashboard note the "Site URL" (see screenshot below). This is going to be the base of the URL of the OpenID provider and will be used quite a lot throughout this guide.
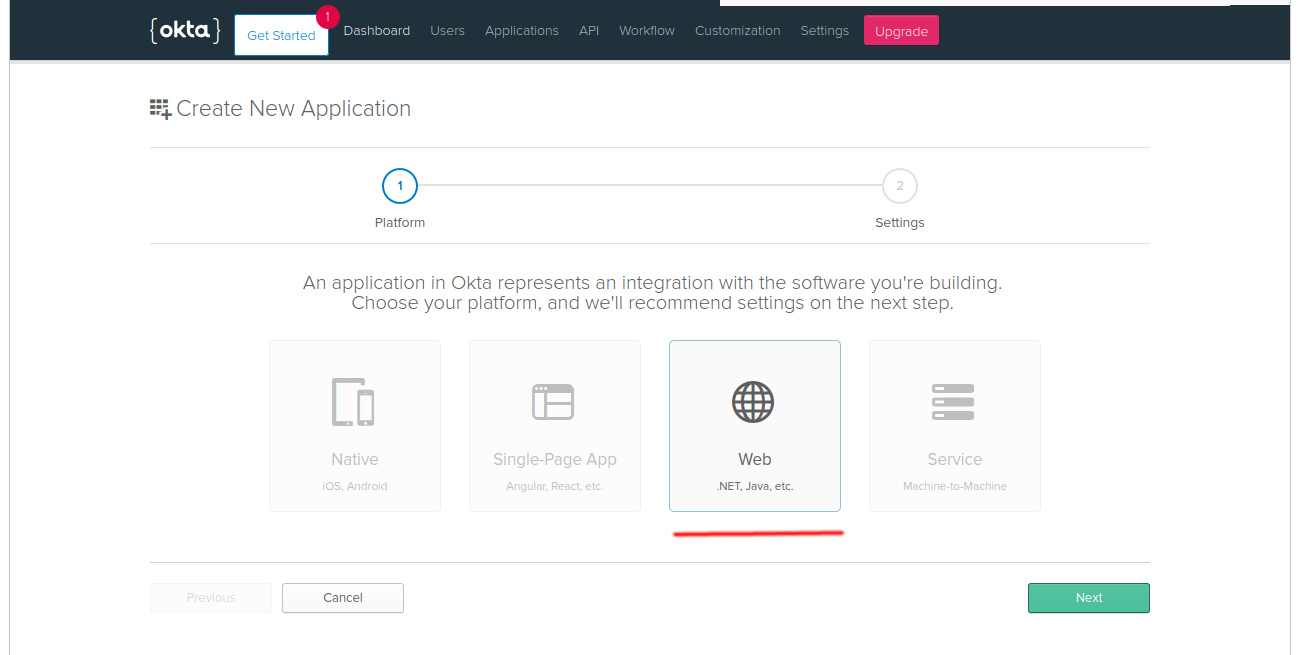
Add a new application of "Web" type. OpenIDConnect supports several auth flows and AFAIU only this one supports refresh tokens that kubernetes clients rely on.
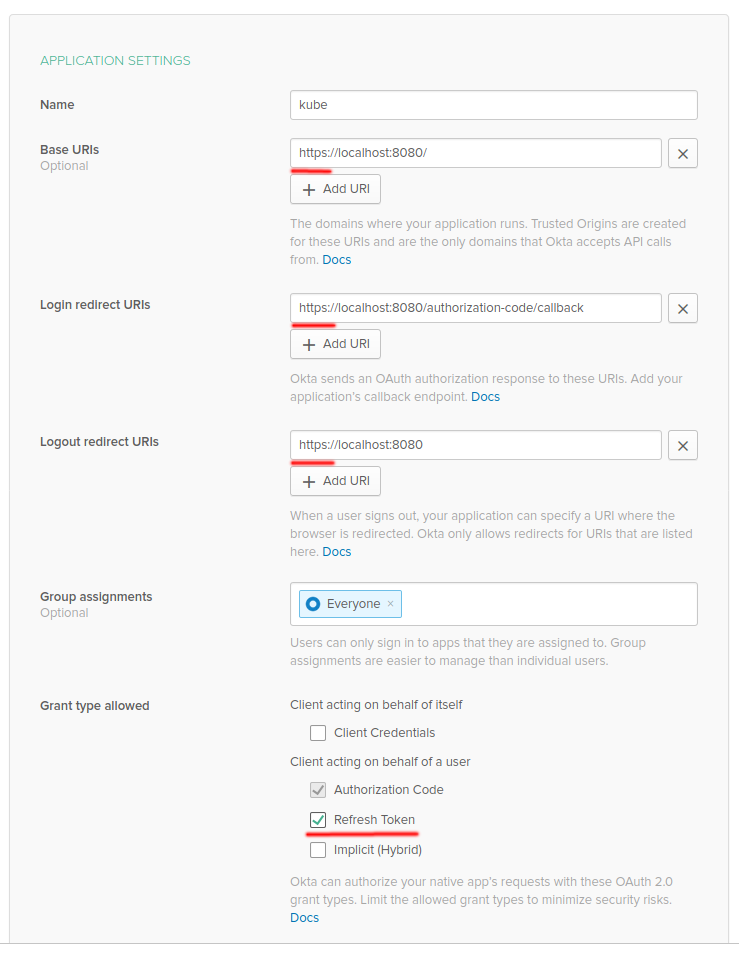
Configure new app (I called mine kube)
- Default Login redirect URI pointing to localhost is almost good enough, you just have to make sure it uses HTTPS scheme - Python's oauth2 lib is picky about that. Change all other URIs to use https as well for consistency.
- Make sure you enable Refresh Token in Grant type allowed - after all we are about to test them in the first place.
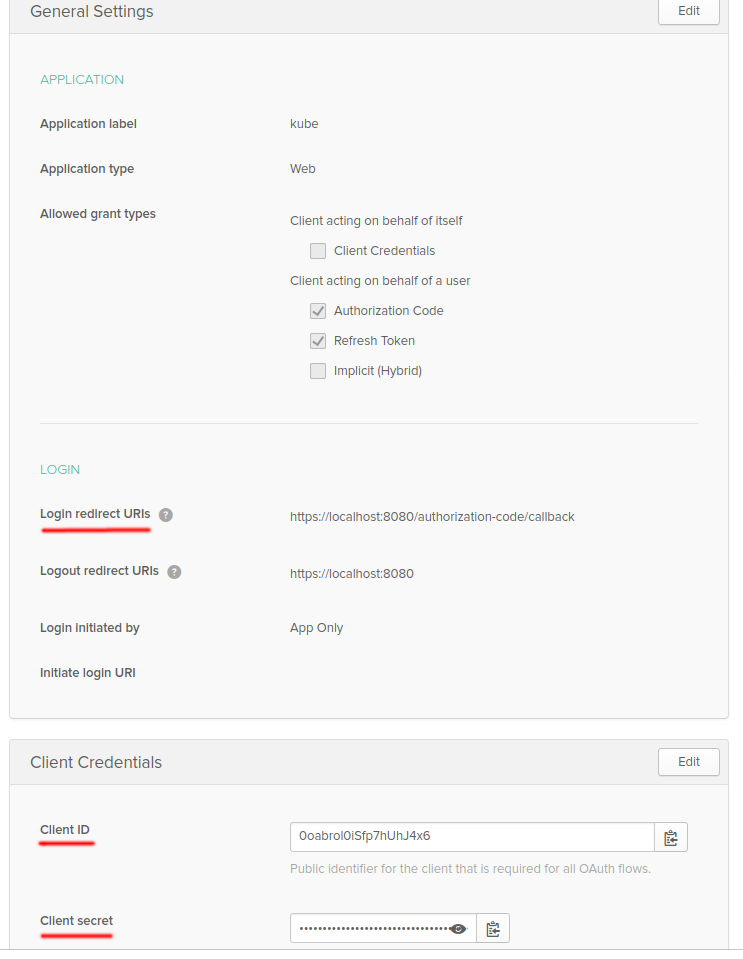
On the "General" settings of your new app there are now 3 details you going to need further:
- Login redirect URI
- Client ID
- Client secret (required by Okta, but can be optional in e.g. Keycloak)
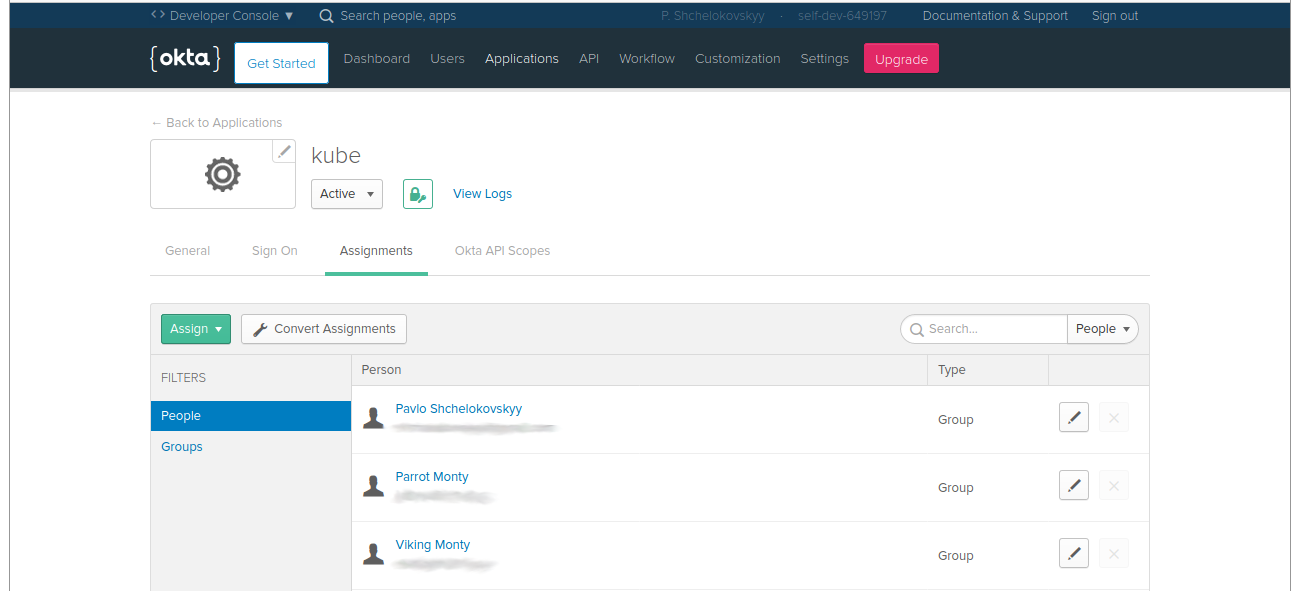
Go to "Assignments" tab of application settings and check that there is at least you yourself assigned as user allowed to use this app (should be by default but better to double check). As you see on screenshot I've added couple more dummy users to my org to play with.
Installing and configuring microk8s
I am using microk8s installed on my local Ubuntu machine for testing.
sudo snap install microk8s
I use it with all plugins disabled, including RBAC one to simplify things.
Edit arguments of kube-apiserver to add the following flags:
--oidc-username-claim=email
--oidc-issuer-url=<okta-site-url>/oauth2/default
--oidc-client-id=<client-id>
where <okta-site-url> is is your site org URL (the one looking like https://dev-NNNN.okta.com) and client-id is the Client ID of the client you've created in the previous steps.
Restart kube-apiserver for changes to take effect.
Obtaining proper kube config
Now is the tricky part where we need some actual code :-)
Effectively we need to pretend we are that web application that we've set with Okta to get the access, id and refresh tokens. There are already OpenIDConnect helpers for that, but most are either public cloud specific (Google, Azure), or otherwise hardcoded to work with other OpenID providers like Keycloak.
Again, to play with Python's libs implementing the OAuth2, I've written my own small helper that theoretically should be compatible with most OpenID providers with minimal changes.
If you've been following this guide, you'd need to set some shell variables first (here and forth I assume we are running in a virtualenv):
pip install pykube-ng requests-oauthlib oauthlib
# the same as oidc-issuer-url we've set up for kube-apiserver
export OAUTH_URI=<your okta site url>/oauth2/default
# copy from Login redirect URI on General tab of our Okta applicaiton settings
export OAUTH_REDIRECT_URI=https://localhost:8080/authorization-code/callback
# copy Client ID from General tab of your Okta application settings
export OAUTH_CLIENT_ID=<your client id>
# copy Client secret from General tab of your Okta application settings
export OAUTH_CLIENT_SECRET=<your client secret>
Now run the script. It will open your default browser with the login to your Okta site prompt. After logging in copy the whole URL your browser was redirected to and tried to open but failed (as there should be nothing serving requests on https://localhost:8080) and paste it back to the script prompt at the terminal
$ python3 k8s-oidc-helper.py
Please go to "<REDUCTED>" and authorize access.
Enter the full callback URL as attempted by the browser: https://localhost:8080/authorization-code/callback?code=<REDUCTED>
The script will output the token it got in return, as well as a snippet to merge into the users section of your kubeconfig (and persist some of that info in the /tmp/kubeuser file).
Now edit your kubeconfig to add appropriate new context with the new user we've just created and the microk8s cluster we've set up and we are ready to go:
kubectl config use-context <your new context>
kubectl get ns
Testing token refresh in pukube-ng
Now how to verify pykube functionality:
instantiate pykube from this kubeconfig and context
access some kubernetes resources
for example something global like Namespaces
$ python3 -m pykube
>>> [n.name for n in Namespace.objects(api)]
['default', 'kube-node-lease', 'kube-public', 'kube-system']
delete user's id-token from the context
- alternatively you can wait for 1 hour (token expiry in Okta), but do not access the cluster with kubectl and this context during wait time as it will refresh the token for you
try to access k8s again
W/o PR#49 the client can't authorize.
With it is successfully uses refresh-token together with the rest of the info to get a new id token and persists it in the kubeconfig file.
Whenever refresh token expires itself (not sure yet of the Okta defaults for this) you will have to repeat Obtaining proper kube config part to actually login (with password etc) to get a new refresh token.
Links
Links I've found useful and interesting while digging in all this:
- https://developer.okta.com/blog/2017/07/25/oidc-primer-part-1
- https://github.com/gini/dexter
- https://github.com/micahhausler/k8s-oidc-helper
- https://github.com/making/k8s-keycloak-oidc-helper
- https://blog.gini.net/frictionless-kubernetes-openid-connect-integration-f1c356140937
- https://github.com/okta/samples-python-flask/tree/master/okta-hosted-login
- https://requests-oauthlib.readthedocs.io/en/latest/oauth2_workflow.html#web-application-flow
- https://medium.com/@mrbobbytables/kubernetes-day-2-operations-authn-authz-with-oidc-and-a-little-help-from-keycloak-de4ea1bdbbe